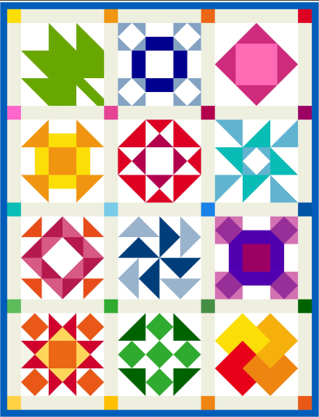
Welcome to the Janome Rainbow Quilt Block of the Month 2021!
Are you ready for a fun and colorful Block of the Month that will add brightness to your sewing, give you a great reason to try new techniques, and, perhaps, even accomplish some scrap busting! Janome Maker Carolina Oneto has put together a delightful variety of blocks just for you!
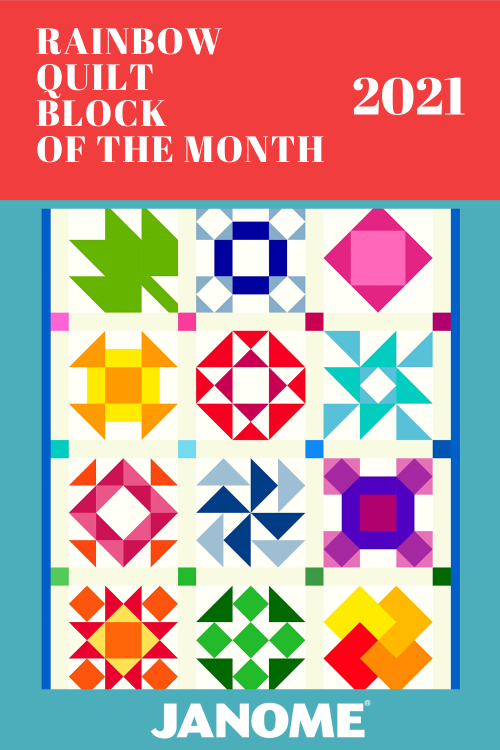
Hello! I am Carolina Oneto, Chilean Quilter living in Brazil and a new Janome maker, for more than 6 years I worked with Janome Chile and now I’m so happy to be a part of the amazing team of Janome makers for Janome America. I am very excited to present you with this beautiful project that we have planned together with Janome! Every month, for 12 months, the instructions to make a 12 ”block (finished size) and by the beginning of next year, you will have all the blocks ready to build this beautiful Rainbow Quilt!
Whether you are a quilter with experience or a beginner, you will love this project! The final measurements of the quilt are 44 ”x 58” (110 cm x 145 cm)
What materials will you need?
Rotary cutter
Cutting mat
Quilter’s ruler
Pins
Scissors
Sewing machine
Walking foot and 1/4” foot
Clips for binding
Neutral colored sewing threads (beige or gray)
The fabrics needed to make the Rainbow Quilt BOM:
1.- White Color: 1 1/2 yards
2.- Beige or light gray color(for sashing) or could be white too: 1 yard
3.- Fabrics of various colors (yellow, orange, red, pink, fuchsia, purple, light blue, blue, light green, dark green, etc.) must be a total of 2,5 yards of fabric. For example 12” x WOF or 1 fat quarter of each color.
4.- Back fabric: 3,5 yards
5.- Batting: 2 yards
6.- Binding fabric (bias): 24-inch x WOF
You can use solids or patterned fabrics! you can use the colors you want.
The key requirement is that the fabrics need to be 100% cotton.
All the blocks will have a finished size of 12” square, so that means the unfinished size will be a 12 1/2” square.
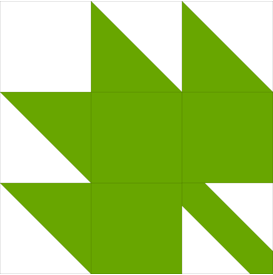
FIRST BLOCK: MAPLE LEAF
Are you ready to hop right in with the first block! Let's make the classic Maple Leaf quilt block.
FABRICS:
White background
·cut 2 squares of 4 1/2 ”
Cut 2 squares of 5 1/4”
Leaf Color (green)· cut 3 squares 4 1/2 ”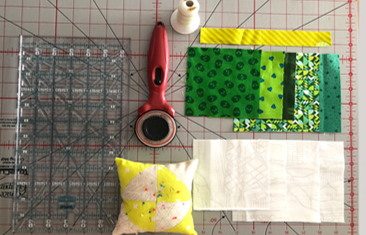
Cut 2 squares 5 1/4”
Stem
Cut 1 ”x 8” rectangle
Block Assembly
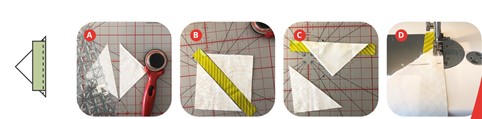
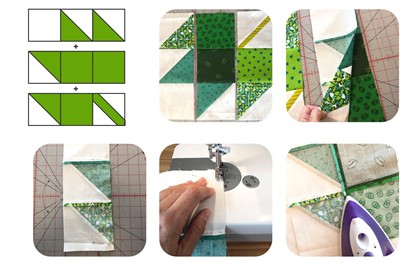
Match up two of the larger size 5 1/4″ x 5 1/4″ leaf squares and background squares and place them right sides together. We are going to use these to make 4 Half Square Triangle blocks.
Draw a diagonal line on the back of one of the squares and sew a 1/4″ seam allowance along both sides of the drawn line.
HALF SQUARE TRIANGLES (HST)
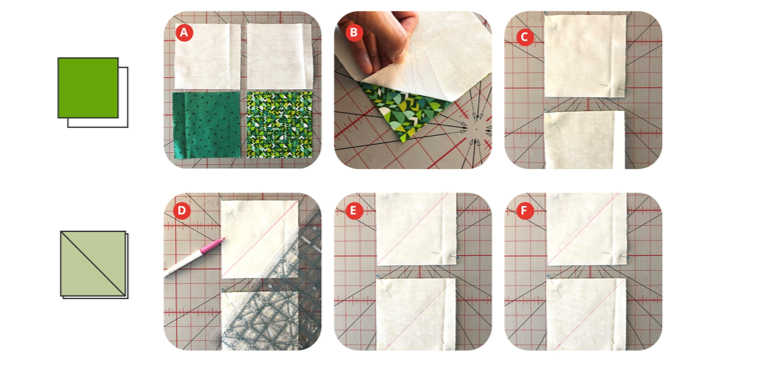
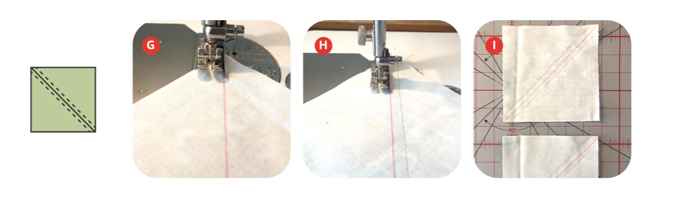
Rotary cut both squares on the drawn diagonal line to get 4 Half Square Triangle blocks. Square-up the HST blocks to 4 1/2″ x 4 1/2″).
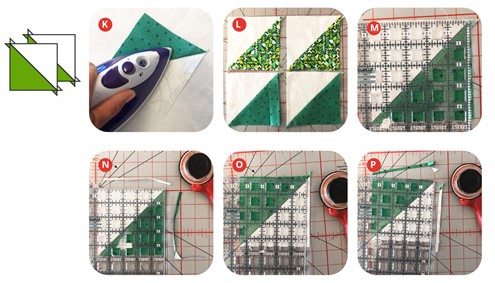
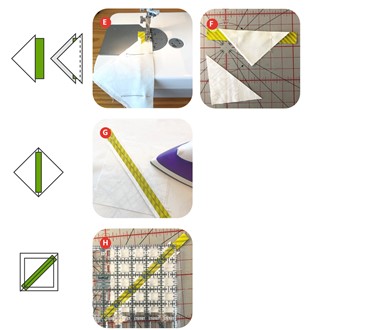
Press seams toward the dark fabric.
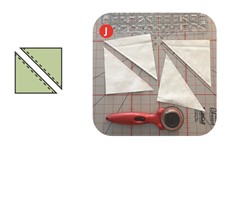
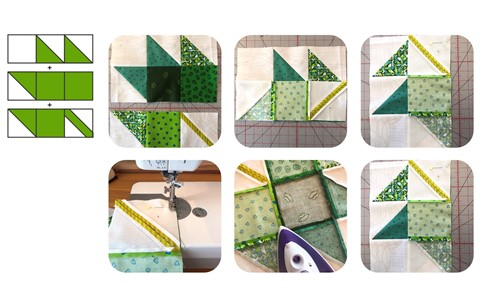
PIECING THE STEM
Cut the remaining large background square in half on the diagonal to create two triangles. Fold rectangle strip in half vertically and finger press to find the center. Fold triangles in half along the longest edge and finger press to mark the center.
Line up the center crease of one triangle with the center crease on one side of the rectangle and sew in place. Repeat with the opposite triangle.
Square up triangle to 4 1/2”
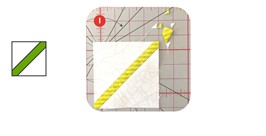
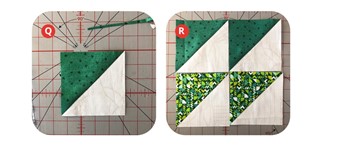
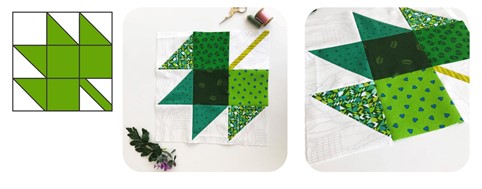
ASSEMBLE THE BLOCK:
Layout the remaining squares, half-square triangle, and stem square to form your leaf.
Sew squares together into three rows. Press seams open.
Sew rows together and press seams open.
And VOILÁ! I hope you enjoy this first block!
After you finish your block, please be sure to share a photo on our social media!
Janome Sewing Classroom on Facebook
Instagram
Pinterest
Twitter
Be sure to use the hashtags
#janomemakes + #rainbowquiltBOM2021
Join Carolina right here, the last Tuesday of each month for the next Rainbow Quilt Block of the Month 2021!